

Dockerizing Spring Boot Applications | Running Multiple Containers Using Docker Compose🐟


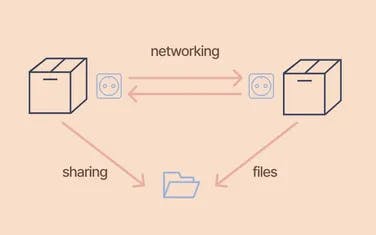
As you know, most of the developers learning Docker as a beginner know how to dockerize an application in a single container but there are plenty of people who are struggling to understand that how to actually dockerize a full stack application running multiple containers and by that I mean running containers (MYSQL & Spring Boot/Node.js etc) containers separately but connected with each other by creating a virtual network called bridge by default, and connects your containers to it.
Containers can only communicate with each other if they share a network.
Containers that don't share a network cannot communicate with one another.
Containers! Containers! Containers!
WHAT ARE THEY?
 Well for those who don't know about containers yet then, a Docker container image is a lightweight, standalone, executable package of software that includes everything needed to run an application: code, runtime, system tools, system libraries and settings.
Therefore, I am writing this article to simplify the understanding of dockerizing a Full Stack Application.
We have a Spring Boot server for this quick example and MYSQL as a Database Server.
I have my personal project configured for this example named "Saiyyara".
application.yml file
spring:

  autoconfigure:
    exclude: org.springframework.boot.autoconfigure.security.servlet.UserDetailsServiceAutoConfiguration

  jpa:
    properties:
      hibernate:
        dialect: org.hibernate.dialect.MySQL5Dialect
        ddl-auto: update
    show-sql: true

  servlet:
    multipart:
      max-file-size: 5MB
      max-request-size: 10MB

base:
  url: http://localhost:${SPRING_LOCAL_PORT}:${SPRING_DOCKER_PORT}

project:
  source:
    files:
      vendors: D:\saiyaara\vendors
      vehicles: D:\saiyaara\vehicles
You must be wondering why there's no database configuration and where are those environment variables?
Well we have defined it in our docker-compose.yml file. Now you must also be thinking now what the heck is this docker-compose now I've only heard about building the Dockerfile and just run it.
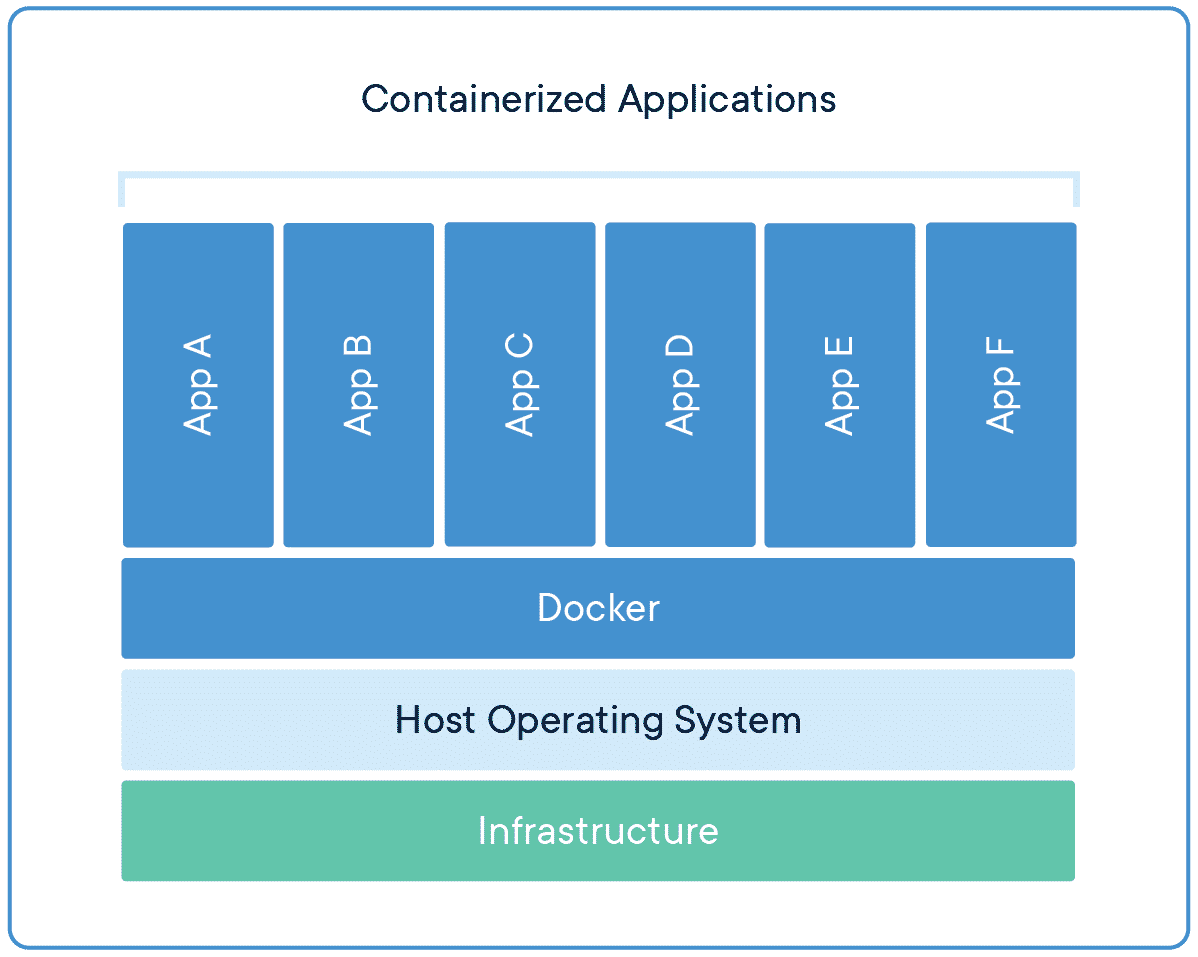
Let me make it clear to you actually, when you need to run a single container it could be either your database server or you application server then you'll just have to do that for that case but when it comes to running the multiple containers at once then you must use docker-compose method as you can see in the image below that how docker handles multiple containers at once.
So cool! isn't?
Yes it is! Alright let's get back to the point where we dockerize our application
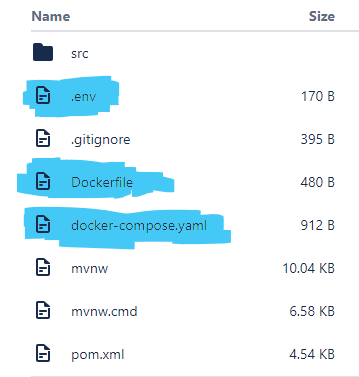
So the first thing what you're gonna do is to create a DockerFile,docker-compose.yml and an .env file in your project directory I am attaching the image file to the directory below where you gonna do this in your Java project.
Let's have a look what we have in these files
DockerFile
FROM openjdk:17
EXPOSE 8080
# first package app in a jar file then define the path to the jar file of your project
ADD target/sayyara-docker.jar sayyara-docker.jar
ENTRYPOINT ["java","-jar","sayyara-docker.jar"]
The FROM instruction specifies the Parent Image from which you are building.
Docker EXPOSE is a Dockerfile directive or instruction specified in the Dockerfile to inform that the image created by this Dockerfile will listen on this port when running a container.
ADD command is used to copy files/directories into a Docker image
ENTRYPOINT instruction is used to set executables that will always run when the container is initiated
docker-compose.yml
version: "3"
services:
  sayyara:
    container_name: saiyaara
    restart: unless-stopped
    env_file: ./.env
    build: .
    image: saiyaara
    ports:
      - $SPRING_LOCAL_PORT:$SPRING_DOCKER_PORT

    environment:
     SPRING_APPLICATION_JSON: '{
          "spring.datasource.url"  : "jdbc:mysql://mysqldb:$MYSQLDB_DOCKER_PORT/$MYSQLDB_DATABASE?allowPublicKeyRetrieval=true&useSSL=false",
          "spring.datasource.username" : "$MYSQLDB_USER",
          "spring.datasource.password" : "$MYSQLDB_ROOT_PASSWORD",
          "spring.jpa.properties.hibernate.dialect" : "org.hibernate.dialect.MySQL5InnoDBDialect",
          "spring.jpa.hibernate.ddl-auto" : "update"
        }'


  mysqldb:
    container_name: mysqldb
    image: mysql
    ports:
      - $MYSQLDB_LOCAL_PORT:$MYSQLDB_DOCKER_PORT

    environment:
      - MYSQL_ROOT_PASSWORD=$MYSQLDB_ROOT_PASSWORD
      - MYSQL_DATABASE=$MYSQLDB_DATABASE
Here, we are configuring the two containers
- Spring Boot Application
- MYSQL
we have imported our .env file for the environment variables so that docker-compose knows what values we have defined in that particular file.
Now let's finally take a look at our .env file
.env
MYSQLDB_USER=root
MYSQLDB_ROOT_PASSWORD=password
MYSQLDB_DATABASE=saiyaara
MYSQLDB_LOCAL_PORT=3307
MYSQLDB_DOCKER_PORT=3306
SPRING_LOCAL_PORT=6868
SPRING_DOCKER_PORT=8080
As you can see everthing is set up now let's do the magic
Runnning docker commands
docker-compose up --build
This will build an image and make the containers up and running when done.
Incase you have done changes in your project then you have to bring your containers down so that they acquire changes you done into the project.
you'll have to run this docker command so that you bring your containers down
docker-compose down
Package your project in jar file again and repeat
docker-compose up --build
Now your container will have your latest changes you had done in your project.
If you have Docker Desktop then you may monitor your docker containers it will show you something like this
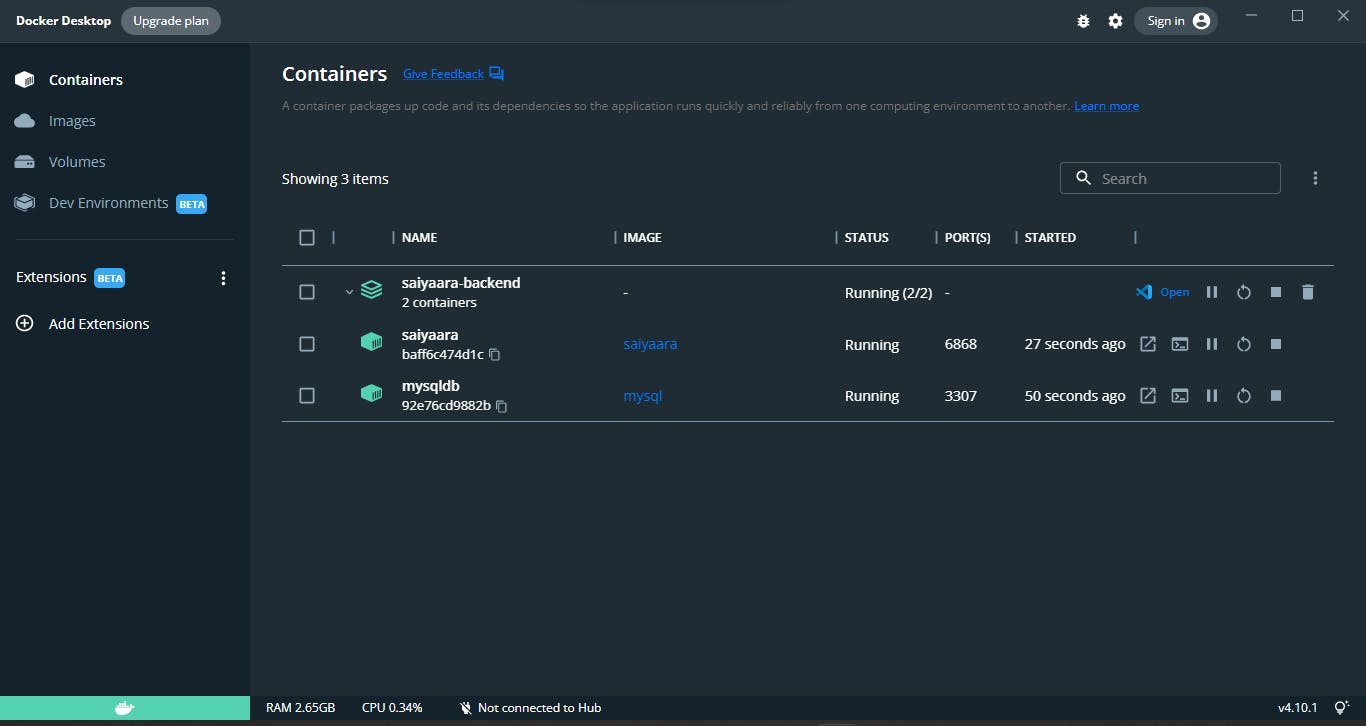
We can request our spring boot server on the port running 6868 as you can see below in the docker process it shows us the port on which we could request on

YAYYY! Now you finally know how to containerize your Full Stack Spring Boot Application.
I hope this might helped you in learning a little if yes then please do follow me on social platforms for more!
Thanks :))